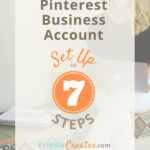
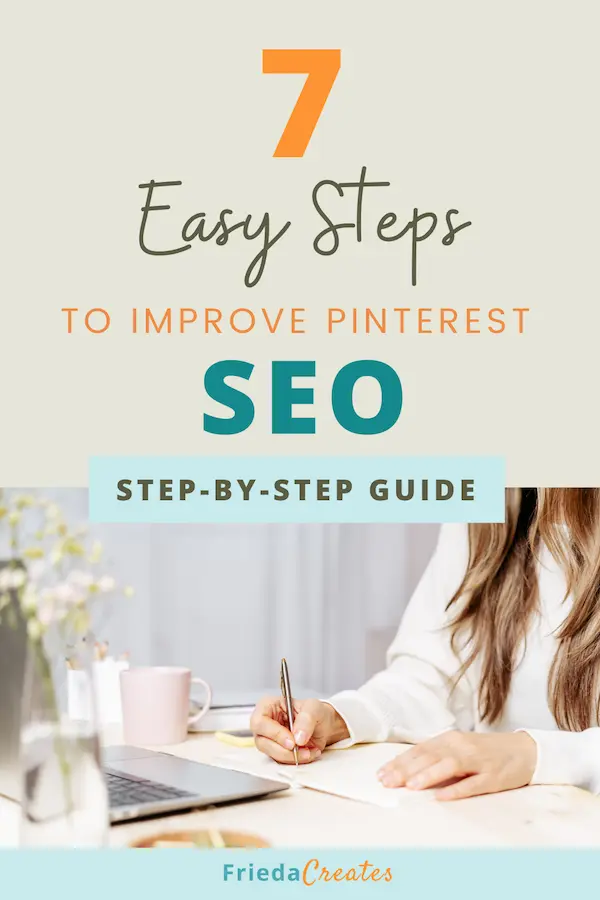
Good Pinterest SEO starts with setting up an optimized Pinterest business account. Learn how with this step-by-step guide.
When I first began on Pinterest I had a heck of a time navigating Pinterest’s platform. Even with plenty of information online, there wasn’t a concise checklist to direct me from point A to point B. You’ll find that here in this step-by-step guide that will help you flow through the foundations of setting up a finely-tuned business account.
When people search on Pinterest, they type in words such as “abstract wall art,” “handmade ceramic mugs,” and “botanical watercolor prints.” Pinterest then scans everything on the platform to decide which results to show.
How does it decide? It looks for accounts, boards, and Pins that are clearly organized, consistently active, and easy to understand. This is Pinterest SEO in action, and it starts before you ever create a single Pin.
Your Pinterest Business Account is the foundation. When it is set up correctly, with a clear profile name, a keyword-rich bio, a claimed website, and well-named boards, you are giving Pinterest the information it needs to understand who you are and what you create. A well-optimized account tells Pinterest: “This is a serious, active business. Here is what it offers. Here is who it serves.”
Without that foundation, even the most beautiful artwork and the most thoughtful Pins can get lost. Pinterest simply does not have enough context to know where to send them.
Think of it this way: Search engine optimization, a.k.a. SEO, is the strategy, and your Business Account is where that strategy takes root. The seven steps in this guide walk you through setting up that foundation the right way so that everything you create on Pinterest has the best possible chance of being discovered.
A Pinterest business account profile is the first step to creating a connection to your website.
Just as it takes time to know someone, it takes time for Pinterest’s algorithm to get to know you. These first steps nurture the lines of communication between Pinterest and your website’s domain.
Whether you are just beginning or reviving an existing Pinterest account, you can expect to have a working Pinterest business account after the completion of these steps.
Once your account is set up, the next step is making sure your boards, Pins, and descriptions are optimized for search. Pinterest SEO for Artists: How to Get Your Work Found picks up exactly where this guide leaves off.
Let’s get started.
Grab the Pinterest Business Account Checklist to use as you follow the steps illustrated below. You’ll also be signed up to receive my monthly newsletter with Pinterest tips & how-tos.
In a hurry? Pin it for later ⤵️
7 Steps to Setting Up a Pinterest Business Account
Step 1 – Set up a new Pinterest business account
First, link to Pinterest. Once you are on Pinterest, choose one of the following three options to create a business account:
- Create a new business account
- Create a linked business account
- Convert your personal account into a business account
Then, follow the steps as outlined in your selection. For the sake of this tutorial, we’ll cover the steps for creating a New Business Account using your desktop.
Pinterest’s onboarding flow may look slightly different depending on when you’re reading this, follow the prompts and use these steps as your guide.
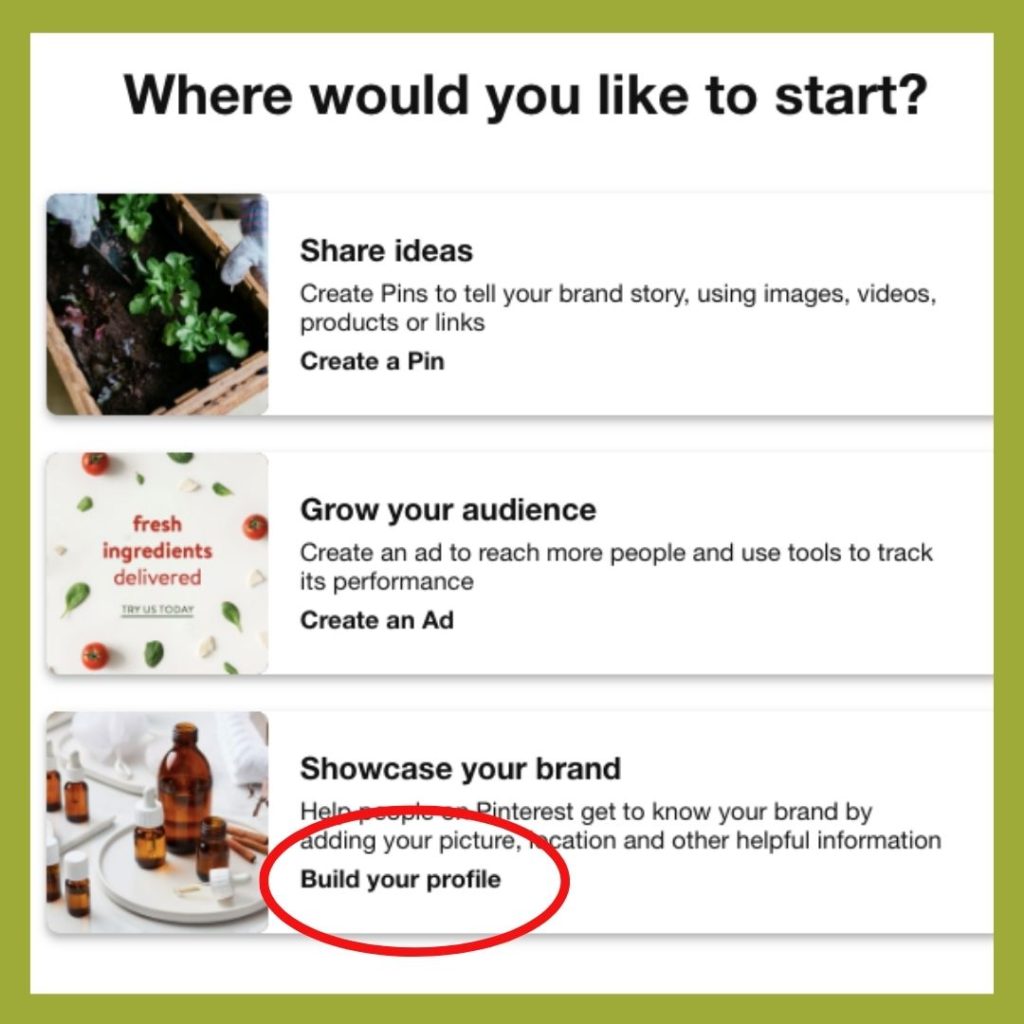
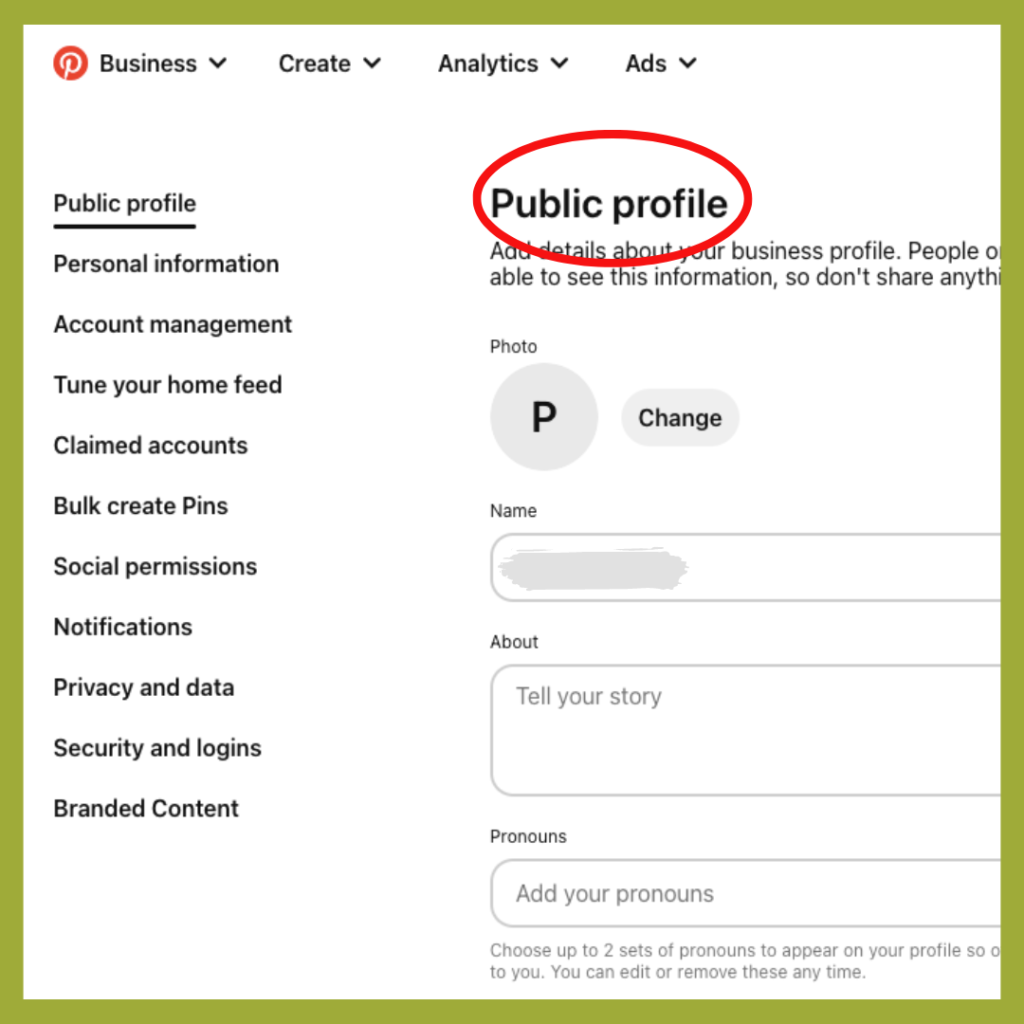
Now you’re ready to Build your profile, go ahead and click as shown in fig. 1. which will take you to the Public profile page, as in fig. 2.
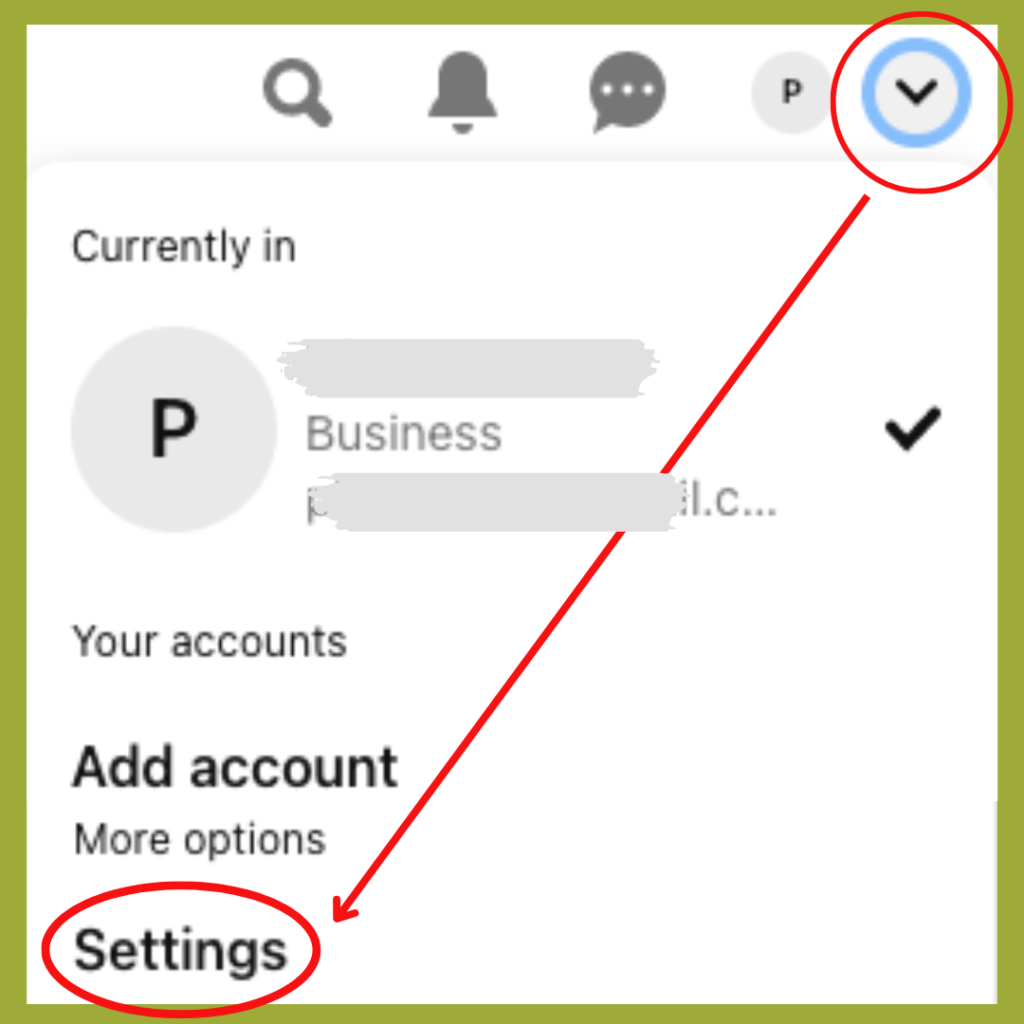
You can also locate the Public profile under Settings which is in the dropdown menu found in the upper right corner of the Pinterest navigation bar, fig. 3.
Now, filling out the Public profile is pretty straightforward, and you’ll find guidance on this in Step 3. But I slipped in Step 2 which guides you on the imagery you’ll need to optimize your profile.
Step 2 – Select two images for your Public profile
In preparation for Step 3, take a moment to select clean, well-lit, and in-focus images to upload to your Pinterest profile. You’ll need two images as described below:
1 – Profile Photo: This is the little circular image centered at the bottom edge of the larger rectangular image. A self-portrait or logo is great here.
Profile Photo Image Specs: 180 pixels x 180 pixels
2 – Profile Cover: This is a larger rectangular image. You can view the placeholder by clicking the Profile photo in the upper right-hand corner of any Pinterest screen.
NOTE: Any time you need to access your Home Page (a.k.a. Created tab), click the little Profile Photo image in the upper right-hand corner of any Pinterest screen. The Home page displays your Profile Photo and Cover images, plus all the Pins you’ve made. (At first, this screen will be empty below your images.)
You need to have a Business Account to customize the Profile Cover. This gives you a perfect opportunity to show who you are, as well as to showcase your brand identity.
Profile Cover Image Specs: Horizontal with a 16:9 ratio.
Horizontal Image: 800 pixels wide x 450 pixels tall
“Great things are not done by impulse, but by a series of small things brought together.” Vincent Van Gogh
With the first two steps completed these next ones will move along nicely. Plus, some of the heavy lifting can be delegated to your web developer unless you’re a do-it-yourselfer.
If at any point you feel overwhelmed [brief pause for service announcement] take a look at Frieda Creates One-on-One Coaching service. I’ll take you through the steps in this article and more, such as how to research keywords, build boards, design Pins, set up your account for SEO, and more. Click here to learn how Frieda Creates can help you build an optimized Pinterest Business Account. Read on for Step 3.
Step 3 – Edit your Public profile
Be sure to fill in the blanks corresponding to these ‘essentials’, sea blue below:
Profile Photo: Click Change to insert the Profile Photo you selected above.
Display Name: Besides writing your Name, or Company Name, describe what you do. Use keywords. The example, below, not only states a name but offers insight into your business.
Format: Business name (or your name) | What you do (how you help)
Sample: Frieda Creates | Artist & Pin Coach
About: A.k.a your bio. Here’s another place to insert keywords and biz pillars, and to demonstrate how you can help. Write your heart out! 500 characters are allowable in this space. Take a peek around Pinterest to see how other businesses like yours are expressing their profile. Remember: Use your own words, share your distinctive qualities…be you.
Format: “I help (who) to achieve (what), add one or several keywords that define you.”
Sample: “I help creative solopreneurs market their business using Pinterest by infusing art, intuition & color energy.“
Pronouns: You have the option of entering up to two sets of pronouns, which will be visible to people who visit your profile.
Website URL: Your website is the destination for the traffic you’re attracting through Pinterest marketing.
Username: This name will appear in your Pinterest account URL, your unique web address. A combination of letters, numbers, and underscores are allowable; or just letters. Minimum 3 characters up to 30. No spaces, punctuation marks, or all numbers.
Format: www.pinterest/username
Sample: www.Pinterest/FriedaCreates
Email address: Your business email is a Business Account-only feature that gives people a way to contact you. This is open to public viewing.
Country code & phone number: Your business phone number is a Business Account-only feature that gives people a way to contact you. This is open to public viewing.
Business Address: This is helpful if you have a brick & mortar, offering another resource for finding your business. Again, this is a Business Account-only feature and is open to public viewing.
Remember to add your Profile Cover image! (Refer to Step 2 for specs)
Profile Cover: Click on your Home page (via the circular Profile Image in the upper right corner of your Pinterest screen). Click Add a cover and follow the prompts for how to insert a Still Image.
Step 4 – Edit your Personal Information
Find this section under settings from the dropdown arrow in the upper right corner of your Pinterest screen. Fill in each section, including under Community Information and Business account goals. These tools will serve you well especially if you plan on setting up a Shop tab.
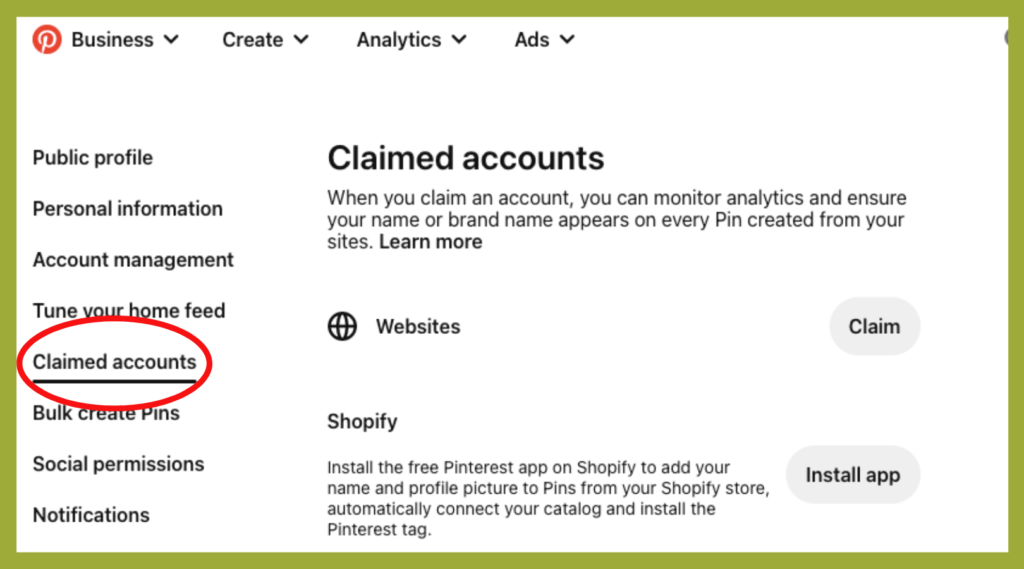
Step 5 – Claim your Website
First, we’ll claim your website. From Settings select Claimed accounts from the left sidebar menu. Next, click the Claim button to the right of the Website, fig. 4.
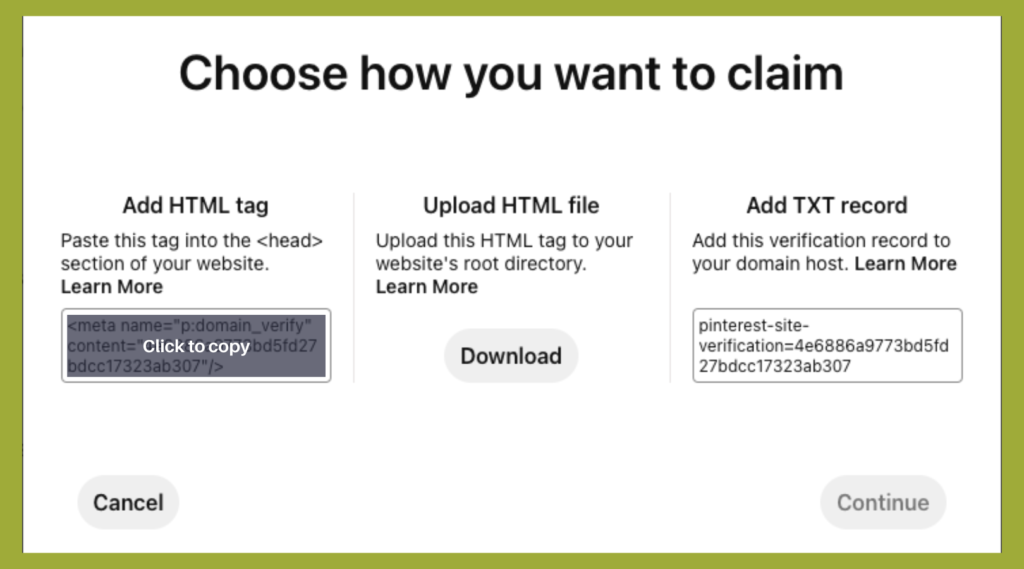
Now, copy the code by clicking the code under Add HTML tag, fig. 5.
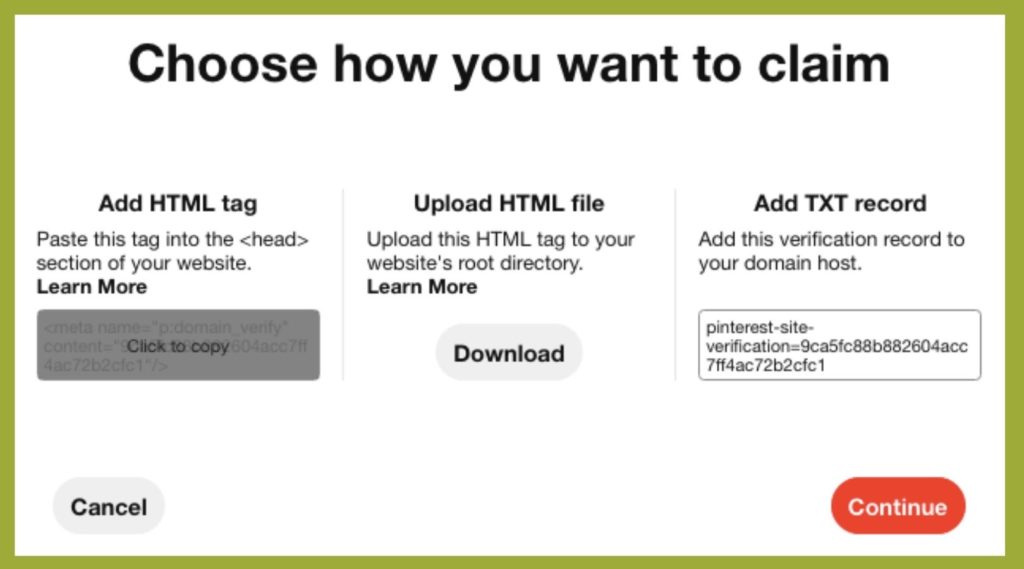
Send the code to your web developer (unless you’re a DIYer) along with this link: Web Developer
Once you have confirmation from your developer that the code has been inserted onto your website, repeat the steps above to claim your website, including clicking to copy the code.
You’ll notice that the Continue button (lower right of the pop-up window) will become activated, changing from grey to red. Click the red Continue button to verify your account, fig. 6.
Next, enter your website URL and click Verify, fig. 7:
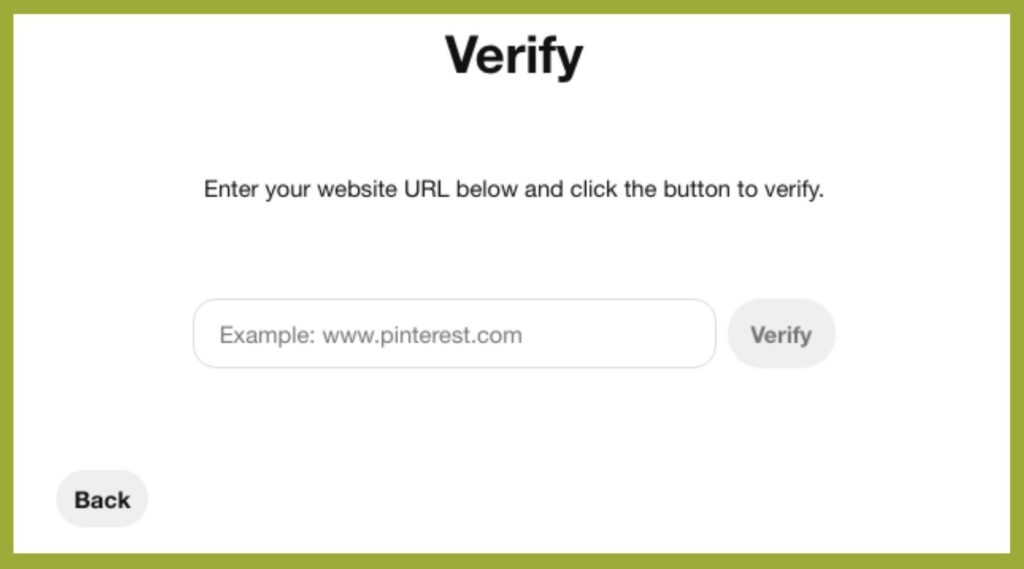
After you click Verify, Pinterest will automatically check for the HTML tag and claim your website.
Step 6– Enable Rich Pins
What are Rich Pins?
“Rich Pins show metadata right on the Pin itself, giving Pinners a richer experience and increasing engagement,” says Pinterest.
Rich Pins stand out in the feed by including extra information. In addition to that, Rich Pins respond to updates made to the originating content on your website. In other words, if the original recipe or article on your website is rewritten or changed, then a Rich Pin automatically reflects the changes.
Rich Pins help aid all of our efforts to share valuable and accurate information.
Here again, you can pull in your developer. Head on over to Pinterest for the instructions on this step. Click to Learn About Rich Pins. I encourage you to get familiar with the instructions before passing them on to your developer. Plus, you’ll need to determine which Rich Pin type to apply for, there are four:
- app
- article
- product
- recipe
Rich Pin directions for your developer are on the link below. Just click the link, copy the URL, then send it in an email to your developer.
Good news! Rich Pins are free. Rich Pins are designed to sync information from your website to the Pin itself, check Pinterest’s current help documentation to confirm functionality for your account type. Check the Pinterest Help Center for the latest on Rich Pin types and setup.
You can skip this step for now if it’s just too much. Remember to put a date on your calendar and circle back to this step.
Take advantage of Rich Pins to stand out in the crowd.
Step 7 – Add Website Enhancements
Enhancements, or Add-Ons, are buttons that make it easy for your website visitors and Pinners* to save content they like. People saving your content broadens your reach. More good news! You can delegate this step to your developer, too. Woohoo!
There are five different add-ons. Here, we highlight two:
- The Save button allows website visitors to save content they like on Pinterest.
- The Follow button lets Pinners quickly follow your business’s Pinterest profile.
Send these links to your developer to get set up:
The other three widgets (Pin, board, and profile) give site visitors a quick taste of your Pinterest account. Learn more about these here.
Now that step 7 is complete, it’s time to pat yourself on the back.
You now have a Pinterest business account with a solid framework!
The important next steps to building out a Pinterest account include:
- Creating boards with keyword-rich titles and descriptions (scroll for a brief lesson on board making
- Researching keywords that define the pillars of your business and how you can help
- Designing Pins that are both visually captivating and searchable
For a complete guide to all three of these steps as they apply to artists specifically, read Pinterest SEO for Artists.
Remember to grab the checklist!
Be sure to grab the 7-Steps Checklist. Just sign up below (if you haven’t already). Plus, as part of the mailing list, you’ll be the first to learn how to use Pinterest to market and sell your art. How can you resist?
As a bonus for sticking with me this far, here’s a brief lesson on adding boards to your new Pinterest business account.
Boards are such an integral part of Pinterest SEO because they support the distribution of your Pins, and more. As such, learning about boards deserves a deeper dive. For the purpose of creating a new Pinterest Business account, this guide shows how to create a few boards so that you can start actively pinning content.
Bonus – Create Three On-Brand Boards
To create a board: begin by navigating to your Home page, then select Saved, fig. 8. Once you have selected the Saved tab, the + sign will appear on the right.

Next, click the + on the right side of the page for a dropdown. Click board. Name your board, then click create. A pop-up will appear offering a selection of Pins to add to your new board, select about 5 Pins that are most relevant to your board title. This process helps Pinterest’s algorithm understand what your new board is about. Repeat two more times.
Now you have three boards in their skeletal state. Boards are like file cabinets; they store the Pins you create which are the engines that will magnetize potential clients over time. For a full guide to naming and organizing your boards for search, read The Board Starter Guide.
Ready to keep going?
Take the next step by researching keywords.
Keywords are the building blocks for search engine optimization, they are the guideposts to your Pins that inevitably lead people to discover your business, and find your art on Pinterest. Well-chosen keywords guide Pinners to your website where you can personally nurture potential new collectors.
Being clear on the pillars of your business will enhance your keyword search. Consider who you serve, how you can help, what challenges need to be solved, and what sets you apart from other similar businesses. Hone your individuality and soulful spirit.
Learning how to use keywords is the next step in your journey of setting up a successful Pinterest Business Account. Read How to Use Keywords on Pinterest. You’ll also want to read Pinterest SEO for Artists, a complete guide to making your boards, Pins, and website pages work together for search.
Whether you want to learn the system yourself or hand it off entirely, Frieda Creates has you covered. Learn the fundamentals of building and growing your Pinterest presence with Pinterest Primer, a self-paced online course for beginners.
Found this article helpful? Pin it to your Pinterest Marketing board. ⤵️
Let’s stay in touch.
- Let me know how your setup goes in the Comments, below.
- If you’re searching for ways to succeed on Pinterest read more on my blog and subscribe to my monthly newsletter filled with the latest news, tips, & know-how:
Glossary
Pins: Pins are like ‘posts’ on social media. They are the images that fill a Pinterest feed. When clicked they open to reveal a title and description (similar to a ‘caption’) alongside the image.
*Pinners: Pinners are people who navigate Pinterest and Pin images discovered on Pinterest onto boards or from external media, like a website.
Boards: Each Pinterest account contains a variety of boards, named for the type of Pins contained within them. They are like file folders that hold papers relevant to the name on the file.